按需加载 & 样式自动加载 —— babel-plugin-import
几乎完全转自 一篇文章搞定 babel-plugin-import 插件 ,可以理解为 读后 & 自己敲一遍 的笔记,建议直接读原文章
Background
我们用 element-ui 或 antd 的时候,样式都支持全局引入和按需引入。按需引入需要安装一个 babel-plugin-import 的插件,将全局的写法变成按需引入的写法。其实也是用了AST语法树转换的原理,实现
1
2
3
4
| import { Button } from 'antd';
↓ ↓ ↓ ↓ ↓ ↓
var _button = require('antd/lib/button');
require('antd/lib/button/style');
|
Usage
1
2
3
4
5
| {
"libraryName": "antd",
"libraryDirectory": "lib",
"style": true,
}
|
其它的看 文档
Working mechanism
What does babel-plugin-import do
1
2
3
4
5
6
7
8
9
|
{ "libraryName": "antd", style: true }
import { Button } from 'antd';
ReactDOM.render(<Button>xxxx</Button>);
↓ ↓ ↓ ↓ ↓ ↓
var _button = require('antd/lib/button');
require('antd/lib/button/style');
ReactDOM.render(<_button>xxxx</_button>);
|
How
以这段代码为例
1
2
| import { Button, AutoComplete } from 'antd';
ReactDOM.render(<Button>提交</Button>);
|
第一步 依赖收集
babel-plubin-import 会在 ImportDeclaration 里将所有的 specifier 收集起来,详见如下 ast
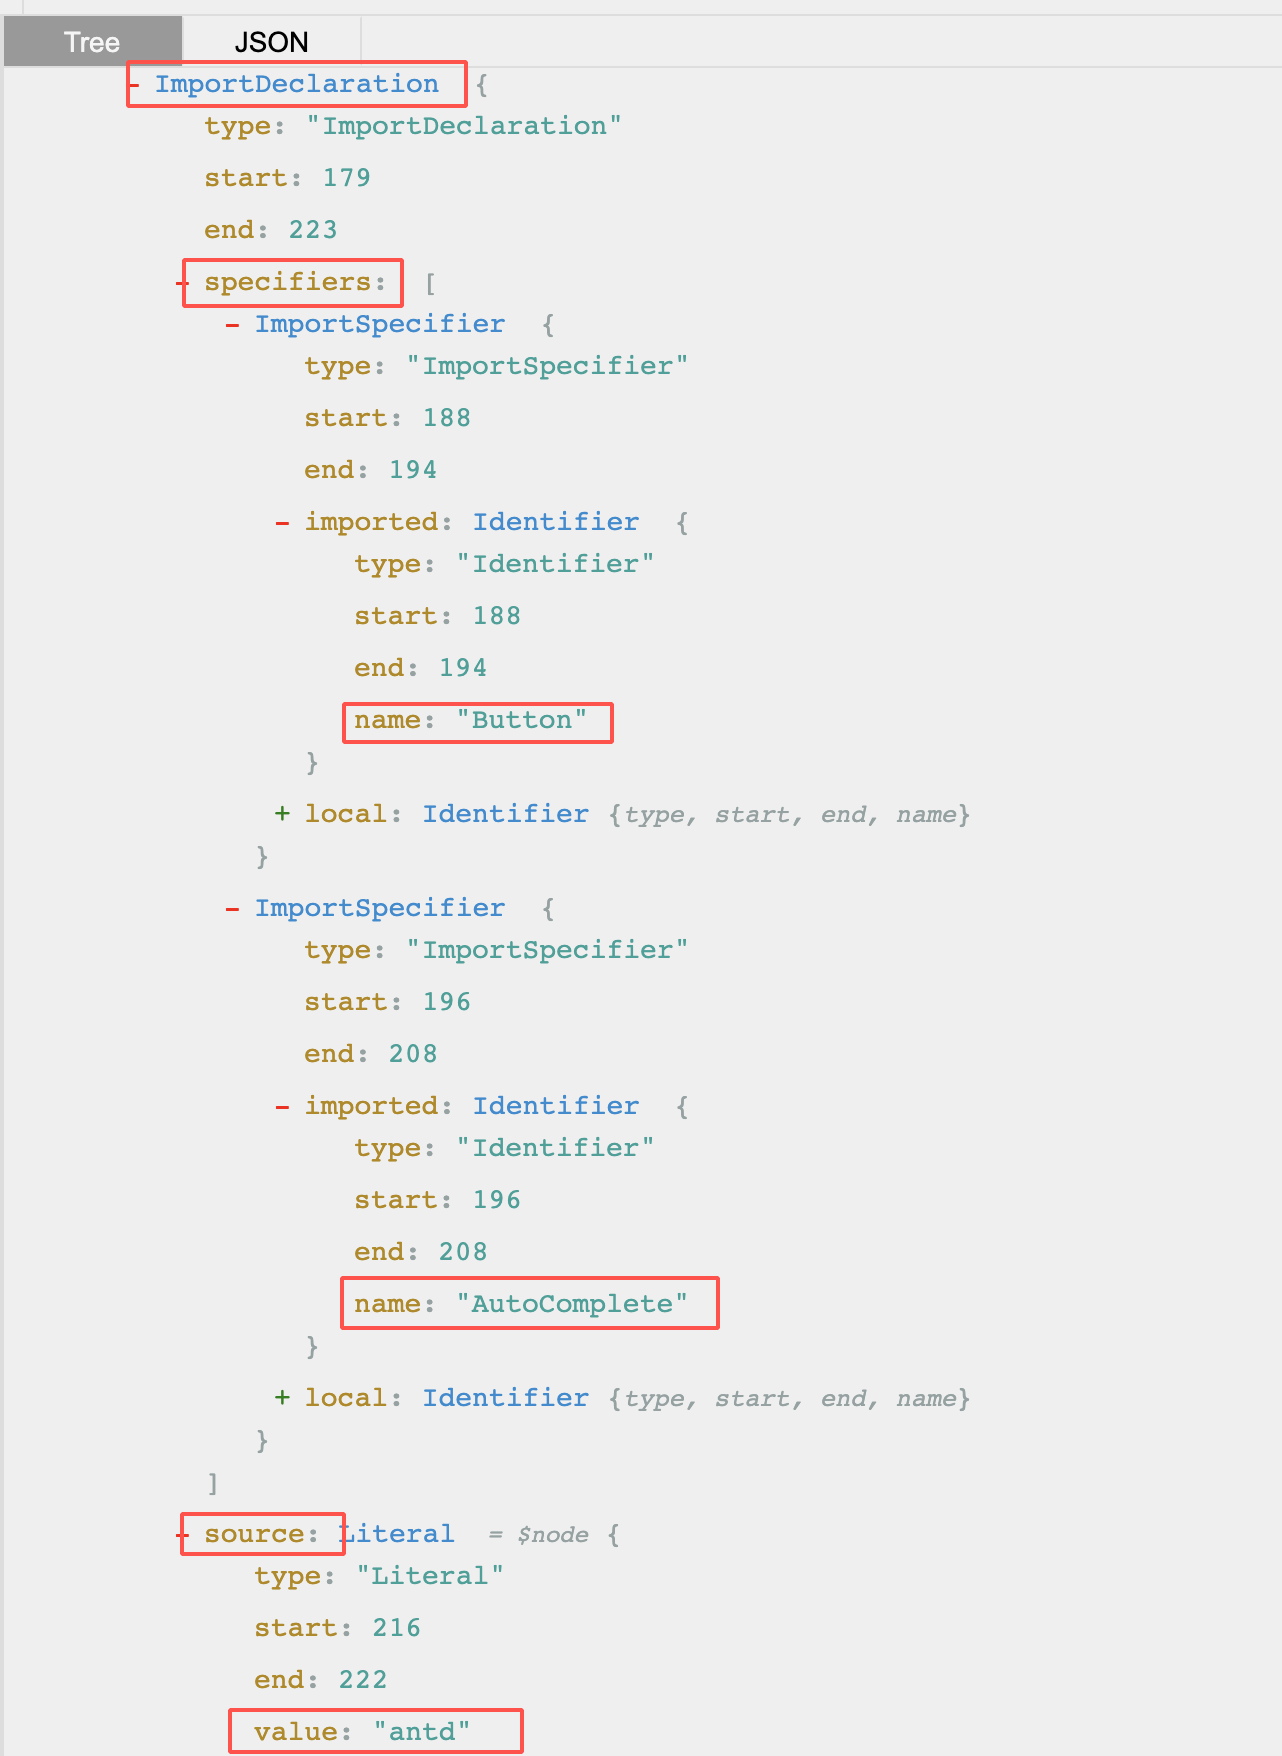
可以从这个 ImportDeclaration 语句中提取几个关键点:
- source.value: antd
- specifier.imported.name: Button
- specifier.imported.name: AutoComplete
PS: local.name 是导入进来的别名,比如 import { Button as MyButton } from 'antd' 的 MyButton ; imported.name 是真实导入的变量名
所以要做的事:收集 依赖名 和 依赖来源。插件的代码可以实现如下:
1
2
3
4
5
6
7
8
9
10
11
12
13
14
15
16
17
18
19
20
21
22
23
24
25
26
27
28
29
30
| ImportDeclaration(path, state) {
const { node } = path;
if (!node) return;
const { value } = node.source;
const { libraryName } = this;
const { types } = this;
const pluginState = this.getPluginState(state);
if (value === libraryName) {
node.specifiers.forEach(spec => {
if (types.isImportSpecifier(spec)) {
pluginState.specified[spec.local.name] = spec.imported.name;
} else {
pluginState.libraryObjs[spec.local.name] = true;
}
});
pluginState.pathsToRemove.push(path);
}
}
|
遍历了所有的 ImportDeclaration 类型的节点之后,就收集好了依赖关系,下一步就是如何加载它们了。
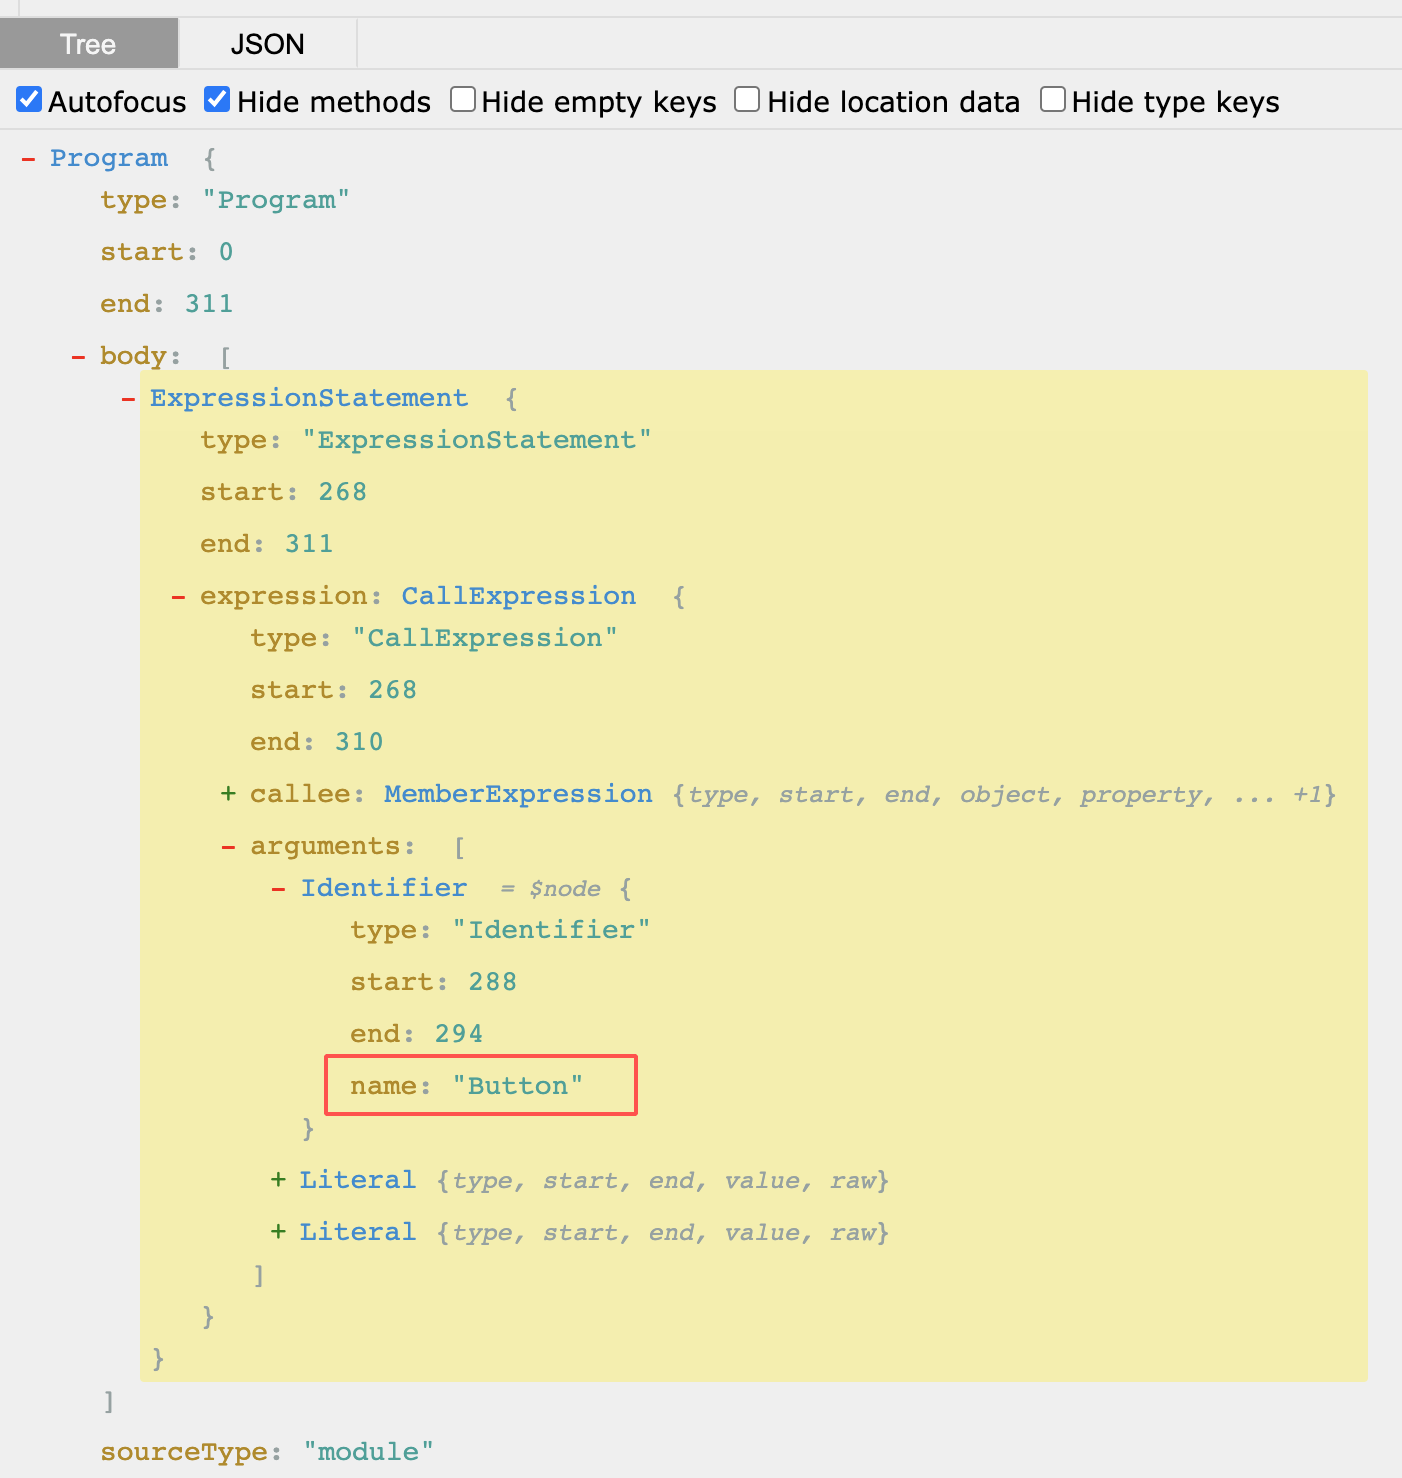
第二步 判断是否使用
判断import进来的组件是否有在后续代码中使用,即是下面代码中 createElement 的第一个参数,我们需要判断收集的依赖中是否有被 createElement 使用
1
2
3
| ReactDOM.render(<Button>Hello</Button>);
↓ ↓ ↓ ↓ ↓ ↓
React.createElement(Button, null, "Hello");
|
所以我们可以看下 React.createElement(Button, null, "Hello") 的AST
代码如下:
1
2
3
4
5
6
7
8
9
10
11
12
13
14
15
16
17
18
19
20
21
22
23
24
25
26
27
28
29
30
31
| CallExpression(path, state) {
const { node } = path;
const file = (path && path.hub && path.hub.file) || (state && state.file);
// 方法调用者的 name
const { name } = node.callee;
// babel-type 工具函数
const { types } = this;
// 内部状态
const pluginState = this.getPluginState(state);
// 如果方法调用者是 Identifier 类型
if (types.isIdentifier(node.callee)) {
if (pluginState.specified[name]) {
node.callee = this.importMethod(pluginState.specified[name], file, pluginState);
}
}
// 遍历 arguments 找我们要的 specifier
node.arguments = node.arguments.map(arg => {
const { name: argName } = arg;
if (
pluginState.specified[argName] &&
path.scope.hasBinding(argName) &&
path.scope.getBinding(argName).path.type === 'ImportSpecifier'
) {
// 找到 specifier,调用 importMethod 方法
return this.importMethod(pluginState.specified[argName], file, pluginState);
}
return arg;
});
}
|
除了 React.createElement(Button) 之外,还有 const btn = Button / [Button] … 等多种情况会使用 Button,源码中都有对应的处理方法,感兴趣的可以自己看一下
第三步 生成引入代码(核心)
即删除原来的import,引入我们生成的import。创建import的时候会用到一个插件 @babel/helper-module-imports。后续部分建议直接看原博客一篇文章搞定 babel-plugin-import 插件
插件实现
见原文章
Reference
一篇文章搞定 babel-plugin-import 插件
AST 团队分享


